


Although some insulation jobs are not a good idea to do yourself, there are some that are relatively easy, affordable and safe to do yourself that will save you money on your heating bills.
When to DIY & When to Hire a Professional
This is a general overview of the main types of insulation and our recommendations on whether you should or shouldn’t attempt to install them yourself in your house. We’re assuming you’re not a professional yourself here! Note: there are various methods of installing some of these types of insulation, and some methods are DIY-friendly while others are not; for example attics can be insulated with blanket insulation (DIY-friendly) or blown insulation (needs a professional).
Safe to DIY
- Hot water cylinder & pipe insulation
- Cold water tank insulation
- Attic insulation
- Draught sealing
Not Safe to DIY
- Wall insulation
- Roof insulation
- Window replacement
- Ground floor insulation
- If your house was built in the year 2000 or before and you’re not certain it is free of asbestos.
Asbestos was a common insulation and construction material before it was discovered that it is a dangerous carcinogenic. If your house is of this age and has not been checked for asbestos, you should hire a professional to do so immediately and not attempt to do any insulation yourself until you are sure there is no asbestos present.
Key Things to Know About Home Insulation
U-Value - Lower is Better
U-Value is an important measurement when choosing your insulation, as it indicates the rate at which heat is lost through the material. The lower the U-Value, the more effective the insulation is.
Consistent Coverage
It is much more effective to ensure your house is thoroughly and consistently insulated than to focus on insulating just one area really well. For example, if you spend all your resources on making sure your attic insulation is top-notch and ignore your walls, you are wasting your time.
Insulating Your Hot Water Cylinder & Pipes
This is a quick and easy insulation job and will keep your hot water hotter for longer so you don’t use as much energy/money reheating it. Most hot water tanks come with solid foam insulation already on them. If this layer of foam is quite thin (less than 3 inches/80mm) or if you can feel it getting hot to the touch when the hot water is on, then you should add further insulation to the tank.
A 3-inch thick insulating or ‘lagging’ jacket should be added to the tank, and fit snugly around the pipes going in and out of it. Note: take care not to cover the cap of the electric immersion heater with the jacket.
The pipes are important to insulate too, otherwise they will become the source of heat loss. You can buy pipe insulation that comes in the form of a pre-formed foam jacket that is easily fitted onto the pipes.
Adding this insulation should pay for itself in savings in just a few months.
Insulating Your Cold Water Tank
The cold water tank in your attic provides the water you wash with. Without insulation, the water in this tank is likely to freeze in winter, which can cause leaks, burst pipes and of course a halt to your water supply.
You can insulate your cold water tank yourself, following our step-by-step guide here.
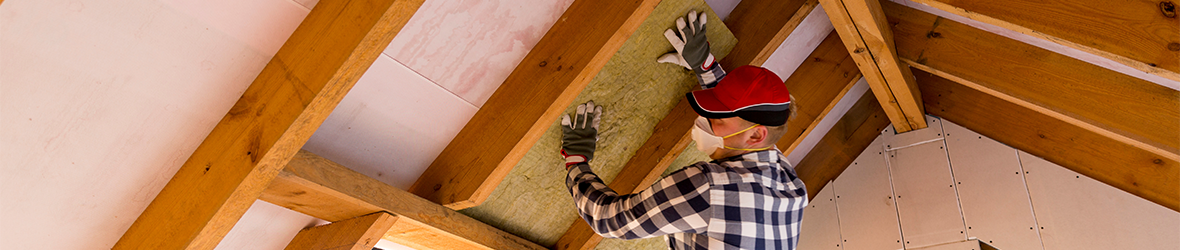
Installing Your Attic
Warm air rises so without insulation most of the heat in your home will escape through the attic or roof. Up to 30% of the heat in your home could be wasted this way, which not only costs you money but also damages the environment.
If the roof of your house is flat or you have a converted attic, we recommend hiring a professional to install the insulation. If you have a pitched roof with an attic space, you may be able to install your insulation yourself.
Follow our step-by-step guide to insulate your attic yourself.
Top Tip: When your attic is insulated at the joist level, you must insulate your cold water tank and pipes to prevent them from freezing.
Draught Sealing
Sealing any gaps around windows, doors and pipes that penetrate external walls and ceilings will prevent cold draughts and heat loss.
Compression seals are ideal for the openings of doors and windows, while fillers and sealants are ideal for the gaps around their frames or any other gaps in the house, e.g. around pipes or along skirting.
When Not to Draught Seal
- You should not DIY draught seal in rooms with combustion appliances (e.g. open fire, stove, gas fire, oil/gas/solid fuel heaters) because ventilation in these rooms is of such critical importance.
- All rooms need some ventilation, particularly rooms with ensuites, bathrooms and kitchens. If a room does not have a ventilation source such as air brick, a wall vent or a chimney, you might be better off leaving part of the window unsealed. Look out for condensation and mould, which are signs of a lack of ventilation and make sure you regularly open the window to allow fresh air to circulate the room.